homemade airbrush makeup cleaner

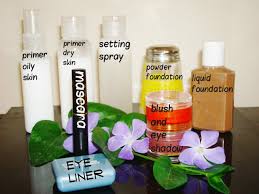
Countless shirts have been ruined by an innocent hug that left a large foundation smear. While your first inclination might be to reach for the makeup remover, think again. The oil, which is meant for the skin, might actually make the situation worse. Save your shirts, towels, bath mats, and more with three tips for removing foundation stains. Just keep reading for the details. How to Get Powder Foundation Out of Your Clothes: How to Get Liquid or Cream Foundation Out of Your Clothes: Turn to shaving cream to remove smears of oil-free foundation from collars, carpets, and bath mats. You can also mix in a touch of alcohol if the stain won't lift with shaving cream alone. After treating the fabric, throw it in the wash to really get that stain out. If the handy-dandy Tide to Go pen ($9) fails you when it comes to oil-based foundations, pretreat the spot with dish detergent to counter the oil in your liquid foundation. Foundation not your only makeup slipup? Find out how to clear up nail polish spills and dissolve lipstick stains, too.

By signing up, I agree to the Terms & to receive emails from POPSUGAR. By signing up, I agree to the Terms & to receive emails from POPSUGAR. How to get Makeup out of carpet Reporting system for use by manufacturers, packers, and distributors of cosmetic Resources on legal, regulatory, and policy issues related to cosmetics Information on compliance with and enforcement of laws and related FDA regulations for cosmetics FDA's involvement in international activities related to cosmetics, including imports and exports Required labeling information, ingredient names, claims, and more Information on selected cosmetics products, ingredients, and potential contaminants Information on research related to cosmetic products, ingredients, and testing Information for consumers, health professionals, industry, salons, educators and Spanish speakers Recent news, meetings, conferences and workshops1. Turn a pencil eyeliner into a gel formula with the help of a match or lighter.
Hold your black, green, burgundy, etc., kohl eye pencil (which typically creates a thin, harder-to-apply line), under the flame for one second, let it cool for 15 seconds, and then watch the consistency change right before your eyes. Finally, glide on your newly made gel liner for an instantly smudgier formula.2. Cover your eyelid with white liner to make any eyeshadow shade pop. To make a sheer or less pigmented eyeshadow appear more colorful on your eyelid, take a white eyeliner pencil, like Make Up For Ever Kohl Eye Pencil in White, and run it over your entire eyelid.
cleaning airbrush with ultrasonicThe opaque consistency of the liner will intensify any eyeshadow shade and make it pop instantly against your skin.
ac coil cleaning wand(Tip via makeup artist Lauren Cosenza founder of Divalicious Blog.)
electrolux air purifier oxygen 3
3. Draw your cat-eye first, and then fill in the open space for a perfect winged liner application every single time. It's much easier this way. Use this tutorial as your guide.4. Use a spoon to create the perfect winged liner. Holding the stem of a spoon against the outer corner of your eye, draw the straight line as the first step for your cat-eye. Then, flip the spoon so it's hugging your eyelid, and use the rounded outer edge to create a perfectly curved winged effect. 5. Draw a slanted hashtag at the outer corner of your eye, and then blend it for an instantly smokey effect.Right: AfterTo create a super-easy smokey eye, draw a hashtag symbol right before the outer corner of your eye and then blend it out with the smudger at the other end of your eye liner.6. Use that same spoon to avoid mascara marks on your upper eye lid. Hold the spoon so it's hugging your eyelid, and then apply your mascara like you normally would. As you sweep the mascara wand against your lashes and back of the spoon, watch as the residue coats the back of the utensil rather than your skin.7.
Add saline solution to a flaky mascara formula to re-wet it. You're only supposed to keep mascara for three months, because beyond that point, it can collect bacteria and lead to eye infections. However, if your mascara dries up within those three months, revive it with a couple drops of saline solution. 8. Hit your eyelash curler with a hair dryer to heat it up, so your lashes curl easier. Blowing hot air on your eyelash curler will help your lashes curl easier and stay curled longer; it works the same way heat changes the pattern of your hair and holds a curl with a curling iron. To do it, hit the lash curler with your blow dryer until it heats up, wait until it cools slightly but is still warm (you want to be sure not to burn your eyelid), and then clamp down on your lashes to curl them. 9. Dust on translucent powder in between coating on mascara to plump up your lashes.The translucent powder helps grip the mascara in between coats, leaving you with fuller lashes.

Try out this tip by following this tutorial. 10. Apply eyelash glue to false lashes with the tip of a clean bobby pin. Use the tip of a bobby pin to evenly disperse the glue along the base of your falsies. Then, wait a few seconds for the glue to get tacky and apply! 11. For long-lasting lip color, swipe on your shade, lay a tissue over your mouth, and then dust translucent powder over it to set the color. This process may seem extensive, but the payoff is worth it. Not only does the translucent powder set a bold shade, like Elizabeth Arden's Ceramide Lipstick in Rouge, making it instantly long-wearing, but the tissue acts as a shield to your lip color, protecting it from lightening or losing it's vibrancy. (Translucent powder, even though it's supposed to be clear, still has a subtle white tint to it that can alter your lip shade.) (Tip via makeup artist Lauren Cosenza.)12. Mix loose pigments with a salve or petroleum jelly to make your own custom lip gloss. If you have loose eyeshadow pigments that you're obsessed with and want to wear as a lip shade, blend it with a little bit of a salve, like VMV Hypoallergenics Boo-Boo Balm, or petroleum jelly in a spoon and swipe it onto your lips.
13. Perfect your Cupid's bow by drawing an "X" on your upper lip first as a guideline. To make the Cupid's bow part of your pout look perfect, the easiest and quickest way is to take a lip liner in the same shade as your lipstick and create an "X" at your Cupid's bow. Then, apply your lipstick as you normally would and voil!14. Conceal dark circles and puffy eyes the right way by creating a triangle with your cover-up. You might be a fan of dotting on your concealer in the spots you need it, but the best way is it to actually apply it in a triangular formation with the base of the triangle directly under your lashline and the point toward the bottom of your cheek. This shape helps conceal any redness at the bottom of your eye and at the sides, and then instantly creates the illusion that your face is lifted, since the brightest point is the most intense under your eye.15. Make contouring look more natural by using a pencil, pen, or makeup brush handle as your guide to finding exactly where your cheekbone is.

Not everyone's face is created equal, so where your BFF might be applying her bronzer might not be the best place for you to contour. To tell where you should be dusting on bronzer, roll a pencil, pen, or makeup brush handle right below your cheekbone (directly in the pocket underneath the actual bone) to find the right angle for your face. Once you've found the correct placement, dust some bronzer on your face using a contouring brush, and then diffuse the color so it looks natural. 16. Map the contours of your face with a gel eyebrow pencil, since it's easier to apply precisely and blend in. After you've applied your base, mark the areas you want to contour — the hollows under your cheekbones, your temples, along your hairline, jawline, the sides of your nose, the tip of the nose, and the crease of your eyes — with a deeply colored brow gel pencil, like IT Cosmetics Brow Power Perfector Gel Pencil in Auburn. Brow gel pencils are really concentrated, yet very smudgeable, and it's easy to control the placement of their dark pigment, making them perfect for contouring.