isopropyl alcohol for cleaning cd lens
Words simply cannot describe the kind of dismay one feels when a DVD received from Netflix or Blockbuster makes it half way through a movie and then refuses to play toward the climax of a film. Whether it’s just regular maintenance on our collection of Frasier episodes, or an emergency resurfacing of a movie we’ve been waiting for months to be delivered, we’ll teach you how to clean a DVD and get you back to your regularly scheduled programs…well, not scheduled, obviously, since you can watch ’em any time. The pros and video-philes will tell you that you need to wipe a DVD in a straight line from the center of the disc to the outside edge of a disc because DVD lasers are lead astray more often by a circular scratch or a scratch that follows the path of the laser than by a straight scratch, perpindicular to the path of the laser. Also, never use a paper towel or any paper product to clean your DVDs because these products often have pieces of dirt and particles that will scratch the surface of the DVD.

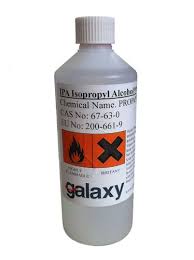
Steps to Cleaning a DVD Microfiber cloths are a quick way to clean a DVD. These are the same kind of cloths people use to clean eyeglasses, monitors, and laptop or LCD monitors. Because of microfiber’s very tight weave and the synthetic materials used to make microfiber, dust and particles of dirt are attracted and lifted up into the microfiber, which prevents you from simply spreading the dust around and scratching the DVD further. Every serious DVD collector should have one of these and wash it regularly. Rubbing alcohol is used to clean DVDs and just about every sensitive piece of technology out there because it doesn’t act like strong solvents do, and it evaporates quickly without leaving a residue. Usually a 1:1 mixture of 90%+ Isopropyl alcohol and water will do the trick. Simply dab a small, clean cotton cloth into the mixture and wipe in straight lines from the center of the DVD to the outside edge. To dry the DVD, just let it sit for a moment or two in a vertical position.

Window cleaner, like rubbing alcohol, is a great way to clean sticky residues and dirt off of a DVD. This isn’t a very “organic solution” but it works. Like rubbing alcohol, window cleaner is not a very strong solvent, and it evaporates quickly without leaving residue as well. Instead of spraying the DVD, spray a little bit onto a soft, cotton cloth and wipe from the center of the DVD to the outside edge—leaving it to dry by propping it up in a vertical position for a few minutes. Check the DVD for deep scratches by holding it up to a bright lamp. If you can see light through the scratch, this means you’ve actually damaged the layers of data protected by the clear plastic. If this is the case, then it is perhaps time to find yourself a new copy of the DVD, or if it will play, then copy the DVD yourself using something like DVD Shrink to compress and burn the contents of your disc to a DVD-R or DVD+R to prevent skipping. If you have minor scratches that are interfering with your movie watching, you can always use toothpaste to polish them out.

Toothpaste is a natural abrasive; that’s how it cleans your teeth, and it will do the same for a DVD. Just dab a little bit of Crest or Colgate on that DVD, mix it with a little water and with either your finger or a small piece of cloth, buff those scratches away. But be careful not to over to it. DVDs aren’t as resilient as your teeth.
green home air duct cleaning boise Using these methods to clean a DVD really does work!
honeywell compact tower air purifier reviewsTo test these theories, I used a DVD-R that I’ve been using as a drink coaster for over a year.
super 8 ionizer ionic air purifierOn this particular DVD, I used rubbing alcohol to clean it, and toothpaste to polish the scratches out.

Sure, it’s not as shiny as it used to be, but it works now. DVD Cleaning Kits and Solvents Sometimes it’s hard to find a DVD cleaning kit at your local Target or Wal-mart, if not for the size of the store, than because they’re rarely in stock, but DVD cleaning are a plenty on the market today. Several reputable brands and products are listed in Amazon for your perusal. DVD and CD cases are good things to have if your collection consists of burned DVDs. DVD wipes made of microfiber from such brands as Memorex and 3M (also labeled Scotch) will help keep your DVD collection spick-and-span. For those more serious complications like deep scratches or particularly scuffed DVDs, there are also a number of kits to help you resurface your DVDs at home instead of having to pay a CD/DVD shop $3 to do it for you. More DVD Cleaning Products Brasso metal polisher is yet another household product people are using to clean their DVDs, or to remove scratches from their DVDs. Actually, only scratches.

Because Brasso is an abrasive like toothpaste or any other polishing substance, it works by grinding down a very fine layer of the clear protective coating on the DVD, to help the laser read your DVD better. Small dabs of this stuff and a soft cotton cloth should do the trick. You can order bottles of Brasso from Amazon. Your local record shop, cd shop, dvd shop, whatever, should have a resurfacing machine in-house to help you fix any DVDs that may be more important to you than a bottle of toothpaste. The going rate for a professional resurfacing is about 3-4 dollars per disc.Occasional cleaning of game consoles is recommend to extend their longevity and restore functionality. The most important tools you'll need for cleaning most parts of a console are Isopropy alcohol, at least 90 percent. 70 percents have other adulterant chemicals in them. Check the label to make sure they didn't add acetone, as it damages (fogging on bottom side) CDs and leaves a residue on cartridges and connectors, over time this build up and causes problems.

Alternativly, Denatured Alcohol as it contains none of these other chemicals. You can find it in a hardware store in the paint section. The point of using alcohol is that it evaporates very quickly. However, if the concentration (i.e. percentage) is low, the alcohol won't evaporate as quickly. This is why you should use 90% or higher. A rubber eraser (not on a pencil) for taking off stubborn corrosion on edge contacts. If you don't have isopropyl alcohol, get some. You can buy a bottle for only a few dollars at any drug store, and one bottle will last you a long time. Do not use Windex/Amonia based cleaning products as they leave a massive residue inside machines that is difficult to completly remove from sockets and cartridge connectors, and can after a while cause a short or arching. The section applies to any port or slot that a circuit board (cartridge, memory card, etc.) or cord (controller, A/V, etc.) attaches to on the console. The best course of action is to take a toothbrush, dip it in isopropyl alcohol, shake it to remove excess, and scrub the offending slot or port.

This is extremely effective for cartridge slots, and for those you don't have to worry too much about being gentle. It's also great for controller ports that use pins (i.e. the Genesis and Atari 2600); you just need to be careful not to bend the pins. For other ports where there are pins on the cord that are inserted into holes on the console (i.e. Genesis A/V cable), you can press the toothbrush against these ports and slide the bristles into the holes to clean them, although this usually isn't necessary. An alternative method for cartridge slots is to take a t-shirt or other thin cloth, soak it in alcohol, and wrap it around a credit card. Slide the cloth-covered card in and out of the slot to clean it. Only go up and down; side-to-side movement may damage the pins. When you clean a slot or port, you should also clean whatever goes in it to prevent the future accumulation of dirt on the connector. This applies especially to cartridges. For consoles which use optical discs, the laser lens can be cleaned very quickly once you have access to it.

Top-loading consoles (PS1, Saturn, etc.) make it very easy to reach the laser since all you have to do is open the lid. Consoles which use a tray or a slot (PS2, 3DO FZ-1, etc.) will necessitate that you open the console to gain access. To clean the lens, start by getting some isopropyl alcohol on a cotton swab, but not too much; just push the tip against the alcohol container to squeeze out the excess. Then use the alcohol-soaked cotton swab to clean the lens by moving the swab gently in circles. Unless it appears you've left a puddle of alcohol behind on the lens, don't bother using a dry cotton swab to wipe it off; the alcohol should evaporate entirely in less than a minute. In many instances, it is sufficient to wipe down a console's plastic with a damp cloth to remove most of the dirt. However, if a console has many grooves that can trap dirt or if you suspect there may be bugs living inside, you may need to open the console and completely separate the inside parts from the outer plastic shell to be able to give it a proper cleaning.

If the console has no stickers or metal pieces, you can inmerse the plastic casing in hot soapy water and wash it thoroughly with a cloth or a toothbrush. After this, leave it to rest in the water for a few minutes, then rinse it and let it air-dry. Keep in mind you might have to blow water out of screw slots, do so with a sharp blast of air. A warning about aging plastic: the casing of many older consoles will become brittle over time. This is especially noticeable in 3rd gen and older consoles which have never been opened before. The most common symptom is that some plastic screwholes may break off as you attempt to remove the screws, even if you are trying to be gentle. Usually the plastic which breaks off is inside the console, so the outward appearance of the console won't be affected. Keep this in mind and weigh the benefits before doing any work on your older consoles. The steps to cleaning almost any controller are usually as follows: Remove the screws on the bottom of the controller and open it.

If the controller you're cleaning has unusual screws, see Proprietary Screw Drives. Take all of the plastic pieces and put them in a bowl with hot soapy water and let them sit there while you clean the rest of the controller. Do NOT soak plastic pieces with sticker labels or permanently attached metal pieces; you'll have to clean those by hand. You'll want to put the most care into cleaning the button pads as those can become very dirty and will lead to degraded controller performance. Inside most controllers, you'll see that the plastic buttons sit atop rubber pads which lay on top of the circuit board. You want to clean the part of the rubber connector that touches the circuit board; usually that part is black, but not always. For rubber buttons (like the Playstation start/select buttons), they themselves have the conducting pad.Dirty pads appear shiny, while clean pads look dull. All you need to do is take a cotton swab and some rubbing alcohol and use it to clean the pads.
Contact pads get very dirty, and for extreme cases you can easily blacken a half-dozen cotton swabs on just one pad; however, that is excessive and you only need to clean the pads until they look dull to restore button responsiveness. You should similarly clean the contacts on the circuit board, which take very little effort to clean. To clean the cord, just take a damp cloth in one hand, gently close the cloth around the cord, and use your other hand to pull the cord through the cloth. Try to keep the wire straight as you pull it; you may damage the cord if you pull at an angle. Scrub the contacts on the cord with a toothbrush and rubbing alcohol. By now the buttons and casing have been soaking long enough, so take each piece and scrub it with a toothbrush, rinse it under a faucet, and lay it out to dry. Be sure you scrub the grooves of the casing and the button holes and also the sides of the buttons and any engraved lettering. Wait for every piece to dry completely before reassembling the controller.

Carefully inspect the side of each button and button hole for any dirt that stubbornly survived the recent scrubbing. In these cases, you should again employ the use of isopropyl alcohol to remove what's left. The best method for cleaning cartridges is simply to use isopropyl alcohol (90 proof) and a cotton swab to clean the contacts. If this doesn't work, you can also use a pink eraser (for a pencil) on the contacts to help make them like new again. The rules and steps for console casing cleaning apply for the plastic parts of cartridges (their casing) as well. To remove Sharpie marks and other types of permanent marker writing, rub over the marked areas with a dry-erase marker, then wipe clean with a paper towel or damp rag. Use caution on labels and stickers, as any break in the printed surface that reveals the paper pulp will absorb the dry-erase marker ink, and will not give it back so easily. For cleaning and taking off very fine scratches; use a small amount of toothpaste and using your finger rub the toothpaste up and down (from the center hole to the outside edge) the bottom of the disc rubbing firmly.