maxim air purifier refills

This free motorcycle was sitting in David Durlach's garage for 20 years.David eventually tired of it, and gave it to Prank, who cleaned out the brake lines and added a new battery. Then winter happened, and it sat in Deepest Darkest Somerville for a year, until prank graduated and moved to California, and I was given care of the motorcycle. I wheeled it back to MITERS to see if I could get it to work. A new battery, some carb cleaner, and a little bit of hope, and it started up! With visions of a cross-Cambridge joyride followed by summers of long-distance road trips, we took it to the road and kicked it into gear.But, every time the gas was added from the gas tank, the 'cycle coughed up and died. I emailed the MIT Motorcycle and they said "clean the carbs". With a monkey wrench and a vague idea of what I was looking for, I did all of the following. Step 1: Get the Float BowlShow All Items« PreviousNext »View All Steps DownloadPur® Ultimate 7-Cup Water Filtration Pitcher The carbon filter in the Pur Pitcher removes 95% of mercury, 96% trace levels of pharmaceuticals and helps to reduce chlorine in your water while keeping beneficial fluoride

Built-in Electronic Filter Life Indicator keeps track of replacement time with a flashing LED light Each filter provides up to 40 gallons of clean water Easy fill, thumb-activated manual lid opening Measures 11-1/3" L x 5" W x 11" H Circulates air at up to 5000 CFM Cools up to 1650 sq. ft. for whole-house cooling Comes with a ¾ hp, 2 speed, 115V motor, pump, rigid media, pulley, purge system, and deluxe thermostat Uses high performance 12 in. rigid media Exterior surfaces electrostatically coated for weather and impact resistance Unique perforated air inlet screen provides more air flow than the competition Thermoplastic water reservoir prevents corrosion Up to 75% energy savings over traditional air conditioning Single inlet design for maximum cooling Engineered for easy access and maintenance UL Classified for safe operation Ideal for dry, arid climates Cool mist humidifier features variable mist output control and a variable humidity control feature.
It has whisper-quiet operation and an auto-off function when water tank is empty. The removable water tank holds 0.9 gallons, and the running time is 11 hours. Suitable for room size measuring approximately 250 square feet. Ultrasonic technology uses high-frequency vibrations to generate a micro-fine mist Fan blows mist into the room where it immediately evaporates adding to overall comfort Comes with a Hydro Stick installed For rooms up to 650 sq. ft.
airfree onix 3000 air purifier reviews Tank and tray are dishwasher safe
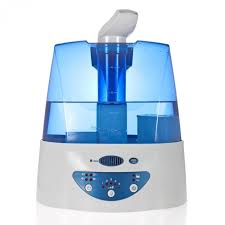
microlux air purifier review EasyFill tank for fast easy refills
aerus air purifier model 82 Humidifier runs on three settings Up to 24 hours of operation and covers 1200 square feet

Approximately 2.5 gallon tank with 4 gallon output per dayoperates up to 12 hours on a single filling Medicine cup allows the use of Vicks Vaposteam or Kaz Inhalent to produce a medicated vapor that sooths FNM Exclusive: Here's What It Takes to Impress Mia Kang, the Winner of Sports Illustrated's 2016 Model Search Hot Headlines: Sofia Resing Really Misses Summer, Gigi Hadid Elbows a Jerk in the Face, and Much More Get a 'Taste of the NFL' With Adam Richman’s BBQ Beef Sandwich The 10 Commandments of a Successful Modern Relationship Let's Get Sauced: 12 of the World's Most Popular Sauces and How to Make Them Fall in Love With These 4 Must-Have Autumn Beauty BuysThe Ultimate Ownership ExperienceAs the owner of a motorhome built on a Freightliner Custom Chassis, you have access to more resources and benefits than any other owner group. Here you’ll find a wealth of resources to help you learn all about your RV, keep it in prime shape and network with people just like you.

Our two-day training session at the Freightliner Custom Chassis Factory Service Center in Gaffney, SC, helps you become more familiar with Freightliner chassis. Topics include the air brake and electrical systems, maintenance intervals, weight distribution, vehicle storage and much more.Learn MoreThe Freightliner Chassis Owners Club (FCOC) is one of the largest and most unique owner associations in the country. Our 4,000+ members hail from across the United States and Canada to participate in social, recreational and informational activities throughout the year. Visit WebsiteView BrochureMAINTENANCE TIPSSage advice from our service experts will help you prevent common issues and keep your motor coach chassis in tip-top shape. view tipsSERVICE AT YOUR FINGERTIPSIn addition to 24/7/365 factory-direct support, FCCC owners have access to the RV industry’s largest service network. The 24/7 Direct app helps users locate a dealer, receive directions, view service hours and much more – wherever, whenever.

And of course, our factory-direct phone support is just a click away. Download the app today!Google PlayitunesWindows Store KNOW YOUR CHASSISAre you a new owner of an FCCC RV chassis? This presentation will walk you through the central features of your new chassis, as well as tips for its care and important contact information. If you’ve got juice brakes on your rig, let me blow your world apart for a moment. Blaise Pascal, a 17th-century mathematician and scientist, came up with an idea that later became a scientific law. Basically, he postulated that when pressure is applied to a fluid, the fluid transmits that pressure equally in all directions. And thus, all the motorcyclists in the world have one square math nerd to thank for the gift of stoppies and skid-stops. I'll explain this in practical terms. If you have hydraulic disc brakes, that 17th-century technological breakthrough explains why you stop. When you squeeze your lever or stomp your pedal, a linkage connects to your master cylinder’s piston and exerts force on the juice within — brake fluid!

The pressure expands equally in all directions, and the most movable item moves. That item would be the caliper piston. That expansion shoves the pads up against the rotors, dragging you to a halt. “Bleeding” your brakes becomes important because air, a gas, is compressible. If there’s air in the lines, it compresses, and the lever or pedal moves, but the piston doesn’t budge. This manifests itself as “soft” or “squishy” feeling brakes — if you’ve got any braking power at all! Bleeding is the process of chasing the air out and sealing the system once again. The process is fairly straightforward on a bike that has had fluid in it: Pump up the brake to achieve pressure, open the bleeder without releasing the brake to expel air, close the bleeder, allow the pedal/lever to return to its resting position. Repeat until the brakes have good feel. Here’s the problem: folks get nervous about it. Inoperable brakes are a Very Bad Thing. So let me help by spelling out some of the things I took years to learn or spaz my way into.

The following tidbits should supplement the video. Cover up, v1.0: Unless you need new paint. Brake fluid kills paint. If you value your bike’s shiny bits, cover them. Cover up, v2.0: Put the top back onto the master reservoir. You don’t have to screw it down tight, but give it a turn or two. As you start to build pressure by pumping, geysers can — and do — form. Splashing onto the top and gasket is no problem. Splashing fluid onto the paint (if you ignored Cover up v1.0) is a problem. Start bleeding at the farthest port from the master cylinder: Your manual may have a specific order to do things, but if it does not, start at the farthest item from the master cylinder. For dual-disc front brakes, that usually means the left front caliper. You can technically do this in whatever order you please, but if you have lots of air in your lines (like if you just put on some new braided stainless steel brake lines), this will drive the most air out quickly, leading you to pump less.

Move over to the next caliper, and to the bleed port at the master cylinder if the bike is equipped. Remember, brakes are a sealed system: If you are losing brake fluid regularly, something is wrong and needs more attention than a simple bleeding job. Similarly, since the fluid level drops as the pads wear, don't just add fluid helter-skelter. If you do, at your next brake job, you run the risk of pushing fluid out of the reservoir when you drive the caliper pistons back into their bores. Keep the master full: Forget this rule, and air will get sucked into the fluid as you pump the brakes. You will then start all over again. Use the right fluid: There are a lot of flavors of fluid out there. Some are based off of castor oil, some off of glycol, and some are silicone-derived. None of those bases play well together. Be sure you’re putting fluid with the correct formulation and boiling point in your bike. Some mix, some do not. For instance, DOT 4 can replace DOT 3, but not the other way around.

DOT 5 and DOT 5.1 sound similar, but those cannot be mixed. If you don't know what is safe to mix, then don't do it. The people who engineered your brake system are smarter than you, I promise. The easy way to swap fluid is to do an extended bleed: Bleed out as much fluid from the master as you can without going dry, then refill it and do it again once or twice. It’s usually easier because the master never goes dry, so you don’t have to worry about what to do if you can’t get any pressure at all when you’re starting. Gravity bleed when you can’t get pressure: Fill the master, crack the bleeders, and wait for the fluid to show up at the bleeders. Gravity will help draw fluid through the system, sometimes getting you enough pressure to finish the job normally. Keep in mind this only works if the caliper is lower than the master cylinder. Bottoms up!: If your bleeder is not facing upwards, you might never “get a lever.” Air bubbles travel upwards, and liquid travels downward.