na50 air purifier

Hygiene, Odors, Germs, Dust Mites, Bacteria, Molds and Mildew control are a huge concern among Athletes, Military, Law Enforcement, Hunters, Fire and Rescue personnel. Military, Law Enforcement and Hunters use sprays of various types to control odors in ballistic gear, clothing, bedding, boots, wetsuits, backpacks, and equipment. The use of sprays, or other smell elimination products to mask the odors generated by our human sweat not only is costly and ineffective but are harmful against our bodies and can be damaging to our gear. GearPure© (GP) uses special air purification technology which produces activated oxygen called O3. The GP technology replicates Mother Nature's way of odor purification, and by placing your clothing or gear in the confined space of your GearPure©, you get the same purification results and benefits. If your job requires you and your gear to be in contact with body sweat, germs, bacteria, and mold, then with use of your GearPure© you can completely eliminate these problems while not damaging your gear in any way.

Litter Box Odor is a huge concern among Cat owners. Let’s be realistic a Cat Litter Box is really nothing more than an open Outhouse! Worse part is it’s indoors. won’t stop us from owning an indoor cat. Think of all the negatives that come from a Litter Box: This OdorBox® will give you and your cat years of trusted service. You’re Family and Friends will never know you have an indoor cat unless they see the animal. Love your Cat, Family, and be Odor Free Forever! More than just an air purifier, Natural Air is the world's first dynamic air regenerator! Not an air filter, not simply a purifier -- Natural Air's unique air treatment process regenerates and restores the dynamic, vital elements of Mother Nature's freshest air to your home, office, shop and store. Feel better by day. Sleep better at night. No filters to buy... ever! Uses less electricity than a 60W bulb! Runs 24/7 for just pennies a day! Effective up to 3,000 sq. ft. The Natural Air Regenerator is effective on:

Designed to treat a single bathroom, laundry room, closet or other small-enclosed space, the NA50 brings air regeneration technology to you in a small package. It's the perfect unit to place near a litter box, trash receptacle or other “problem” area of up to 50 sq. feet. The NA50 is designed to plug directly into any standard 110V household outlet and provide 24/7 service using both negative ions and activated oxygen emissions. The GenII NA50 now has a side mounted switch for both High and Low settings to adjust the unit for any application. Measuring only 3.5” x 2.5” x 2”, the NA50 uses a scant 15W of electrical power for super efficient operation. Email us for a brochure or additional information....Airganix Natural Air 50+ Give your family the Clean Air they deserve Without Fake Fragrances!Costs just 1p/day to run. Buy a second Airganix at HALF PRICE Airganix Natural Air 50+ Standard air fresheners only temporarily cover up a smell by emitting a stronger scent and usually require a trip to the shops for a costly refill every few months.

Airganix brings you a revolutionary new air purifier, the NATURAL AIR 50+ which uses ionisation to remove impurities from the air, including unpleasant odours, pollutants and allergy causing particles. Over three decades of research and development have helped to create a discreet, dynamic and compact air purifier for your home. The Natural Air 50+ unique air treatment process will effectively improve air quality by removing odours including pet and cooking odours, pollutants such as dust and cigarette smoke, and allergens including tree and flower pollen from your home, office or bedroom.
honeywell air purifier model hht-080 Simply plug the unit into a power socket and rotate the dial to maximum.
hamilton beach 04383 true air allergen-reducing air cleaner instructions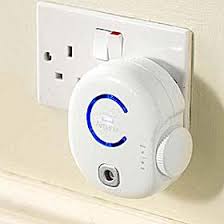
The unit also features an energy efficient �night mode�, is easy to use and 100% chemical free. The only maintenance the Natural Air 50+ will ever need is once every month the air inlet and outlet should be vacuumed clean. Feel better by day and sleep better by night, safe in the knowledge that your home is now odour and allergen free.
oransi hepa air purifier Compact size and portable Effective against odours, allergens and mould Effective in areas up to 30 cubic metres BI-POLAR IONISATION, HOW DOES IT WORK? Bi-Polar Ionisation is the process of emitting electrical energy to ionise and oxidise (electrically charge) air molecules. The charged molecules will then form clusters with airborne particles effectively reducing these solid contaminants from the indoor air.How to get a garage sale Express running, rev 2.1 I have a green ‘78 Express, I know what a pain they can be.

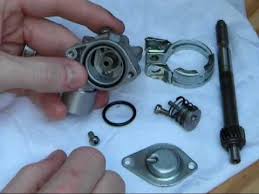
So you wanna get yours to run? Or perhaps it runs now, but not as well as you would like? Well, I will assume that the bike doesn't run at this point and tell you everything you need to do to get it going. First, make sure the petcock works by disconnecting the hose from the carburetor and sticking the hose in a container. Then turn the petcock to on and reserve. If gas comes out, then keep moving on. If not, unscrew the petcock from the gas tank and clean out the filter. The filter will probably get stuck in the tank, so get it out somehow. Keep in mind that you should drain the gas tank before doing these last few things… Anyway, put the filter and the petcock back in, and see if fuel’s going through. If not, get a petcock from another bike. One from Honda is gonna cost a fortune. I know, I checked. If you’re getting plenty of fuel, then pull apart the carb. Clean out the bowl. Clean out the passage that the float needle seals off. Clean out the main jet (the thing that sticks out into the carb bowl from the top section) with something long and thin, but hopefully not sharp.
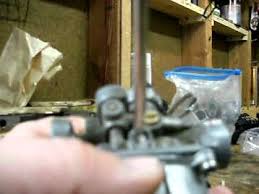
I have used a little bit of thin wire, but its not the best idea. Use a ton of strong carb cleaner on everything (except the float itself). Unscrew both adjustment screws (but first screw them in all the way, counting how many turns it took so you can put them back the same) and clean out the screw passages with strong carb cleaner and such. Maybe soak the whole carb in a bit of cleaner. Look at the little pin on the end of the throttle cable. Take it out (carefully). A C-Clip holds its position on the end of the cable. The clip can sit in any of the 5 grooves. Put the C-Clip in the middle one. Now put it back together. Pull apart the air filter holder. The filter is the spongy thing. It’s probably falling apart. Just pull it out of there for now if it is. Otherwise clean it out and soak it in light oil. Then squeeze some of the oil out and stick it back in the canister. Leave the filter box off for now. Put everything back together and put it back on the bike. Screw the AIR MIXTURE SCREW ( the lower of the 2 adjustment screws ) all the way in, then turn it out 2 and 1/8th turns.

Now turn the THROTTLE STOP SCREW (the top of the 2 adjuster screws) all the way in, and then out about 1 and a half turns. This will need to be changed after the bike is running. Just leave it for now. Remember where they were before you took the carb apart? I hope so, because you may need to set them back to where they were if the bike runs poorly. Now look in the oil tank. Is there oil in it? If it's low, fill it with Honda two stroke injector oil, or something like it. I use the real Honda stuff and find it leaves far less of a carbon buildup then the cheap stuff at gas stations. Now follow the oil line down to the oil pump. Is the line full of oil? Can you see air bubbles in it? If there are bubbles in it, unscrew the little screw on top of the injector and let the oil drain through until you can’t see any more bubbles, then replace the screw. Check the line leading out from the injector. Does it have bubbles in it? 1 or 2 tiny bubbles are okay, but if it has large gaps in it you will have to remove the hose and fill it up with oil, then stick it back on without loosing much.

This sounds harder then it is. There are other ways, but I just do this and it works fine. Look at the front of the transmission. There should be a big bolt that holds a plate in place. With a pan beneath the front of the transmission, remove this bolt. The transmission oil level should be slightly below the opening. If you put a (clean) finger into the hole you should feel oil. If you cannot, you need to add more. If the bike has many miles on it or has come from a questionable source, it is best to drain the transmission and then fill it with fresh oil. To do so, remove the front nut, then place a pan beneath the middle of the tranny. Find the one bolt along the bottom and remove it. Oil should now run from the hole. Leave it sit for some time (and tip the bike so that more runs out if possible) before putting the bolt back in. Now use a funnel to pour in roughly 0.8 quart of SAE 30 motor oil. Then put the bolt and plate back in place (the plate holds the carb overflow tube).
Take off the bike’s seat. It's held on by an odd wingnut under the front of the seat. The 1977 and 1979-1980 express used one type of battery. The 1978 used a different type. The 1981+ used a third larger type. Make sure to get the right one for your bike should you need a new one. Pull out the spark plug. Set the gap to about 0.026 inches(about 0.65 MM). Now connect the plug to the plug cable, and rest the very end of the plug on the head of the engine. Try cranking over the motor a time or two. Is there a nice blueish yellowish spark from the plug? If so keep going, if not you either have a bad cable, bad coil or bad points. It would be a good idea to put in a new plug if the one you have is worn or the wrong type. The 1977 uses an NGK BP6HS. The 1978 and later uses an NGK BP5HS. The UK 1978 and later uses an NGK BPR4HS. Pull the timing cover off (the round shiny metal cover on the right hand side of the motor with HONDA written on it). turn the flywheel until you can see the points (the two metal “Fingers” that open and close as the flywheel turns.

Do they look corroded? Are the surfaces worn and uneven? If so the flywheel needs to come off and the points need to be replaced. If they look fine, they may still be set wrong, but the engine SHOULD still start, assuming they aren't badly off. Before starting, check the following. Now that all this has been covered, make sure everything is back together (except the air filter box). If bike does not start, keep reading. If bike DOES start, skip to the next section. If this STILL doesn't work even after trying each method, and you are on or near a hill, then put the gas cap and air box on, wind up the bike, hold the choke on, and roll down the hill. Part way down, turn the throttle part way open, pull the back brake and quickly release it. If the bike fires up and runs, hold the throttle open and keep going, DO NOT STOP! Do not let it idle. Keep riding like this for about 30 seconds, then turn the choke off. keep riding it a few minutes till its warmed up and then go to the next section.

Once the bike is running and warmed up, park it on the center stand (with the air box on) and slowly adjust the THROTTLE STOP SCREW (the upper one). Turn it out to slow down the idle. Turn it in to speed up the idle. If the bike dies as soon as or shortly after you release the throttle, then increase the idle. If the wheel turns more then very slowly when the bike idles, then lower the idle. Turn it in slow amounts and then rev up the engine for a few seconds, then let it drop back to an idle. If all goes well you now have a running bike. You can also try adjusting the IDLE MIXTURE SCREW if your bike still won't idle well. Turning it in makes the idle mix richer (more gas) which is better for cold starting and idling with the engine cold. Turning it in too much though will also cause problems. Turning it out will result in a leaner mix. This gives a better warm idle and can solve problems of bogging down when accelerating from a dead stop. 2 and 1/8th turns is simply what my bike runs well with.

If you have access to a timing light, You should check your timing. There are different kinds of light, but on mine you hook the power connection to any 12 volt battery (keep in mind your bike has a 6 volt battery), then fasten the sensor around the spark plug cable. you take the timing cover off, start the bike and aim the light towards the timing marks on the engine case. Each time the engine fires the light flashes on. When aimed at the timing marks in a somewhat dark room/area, you should be able to see the F marker on the flywheel lining up with the mark near the front of the crankcase. Keep in mind that F stands for Fire and T means Top Dead Center (the point at which the piston as at the very top of its upward travel). You need to set the timing with F, NOT T!! If the F mark does not line up closely with the marker, you will need to set the timing closer. I wont go into detail right now on that. I don't know what all is involved in turning it into a full speed express.