philips air purifier model ac4014
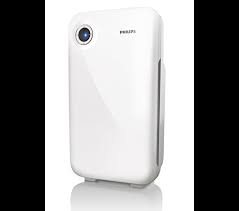
Breathe healthy air with Philips' VitaShield Intelligent Purification system. Fine particles, allergens, bacteria and viruses with size >0.02 micron* are filtered out, while the healthy air protect alert assures you of healthy air always. AC 220 V - 240 V VitaShield IPSSmart sensorCADR (cigarette smoke): 279 meter cube/hFilters out PM2.5: >99%Filters out bacteria: >99.9%AC filter: AC4143HEPA filter: AC4144Frequency: 50 HzWattage: 30 WAir quality sensor(s): particleNoise level: 35 (Lowest speed) - 61 (Highest speed) dBAC4014 Contact Philips User manual... Contents 11 Notices 1 Important Electomagnetic fields (EMF) Safety Compliance with EMF Recycling 2 Your air purifier What’s in the box 3 Get started Install filters 4 Use the air purifier Understand the air quality light Understand the healthy air protect alert Switch on Set the sensitivity of the air quality sensor Change the fan speed Manual... • Make sure all filters are properly installed before you switch on the appliance.

• Only use the original Philips filters specially Warning intended for this appliance. • Check if the voltage indicated on the bottom •... Page 5: What's In The Box 2 Your air purifier Congratulations on your purchase, and welcome to Philips! Read this user manual carefully before you install and use the unit. Save it for future reference. Page 6: Get Started, Install Filters 3 Get started Remove all the filters from the purifier. Install filters The air purifier comes with all filters fitted inside, but you have to remove the packaging of the filters before you can use it. Remove all filters, unpack them, and place them back into the air purifier as described below. Place the pre-filer in the purifier. Note • Make sure that the side with the two projections is pointing towards you, and that all hooks of the pre-filter are properly attached to the purifier. To reattach the front panel, insert the top hooks into the top of the purifier first (1). Page 8: Use The Air Purifier, Understand The Air Quality Light, Understand The Healthy Air Protect Alert

Plug the air purifier into the power supply. » All lights go on twice and you hear a The air quality light automatically goes on when beep. Then, the lights go out again. the purifier is switched on. AC4012 Control AC4014 Control Note Panel Panel •... Page 9: Set The Sensitivity Of The Air Quality Sensor, Change The Fan Speed, Manual (see “Set the timer”). In this Press the button and simultaneously case, one of the lights (AC4012: put the power plug in the power socket. and the light ( , , or ) are on. Press the button to switch on the purifier. Page 10: Sleep Mode In sleep mode, the air filter operates very » For AC4012 - , , or ; and quietly while all lights are dimmed for your undisturbed sleep. Page 11: Set The Timer You can use the timer function in the following situations: Situations You will see Choose a fan One of the lights speed (see (AC4012 - , , or ‘Change the fan AC4014 - , or speed’). and one of the lights ( , , or ) are on.

Page 12: Clean Your Air Purifier, Clean The Air Purifier, Clean The Air Quality Sensor 5 Clean your air Clean the air quality sensor inlet and the air quality sensor outlet with a soft brush.
viratech air purifier reviewpurifier Note • Always unplug the purifier before you clean it.
honeywell whisper quiet air purifier hfd-123-hd• Never immerse the purifier in water or any other liquid.
oreck dualmax air purifier consumer reports Page 13: Clean The Pre-filter 6 Clean the pre- To remove the pre-filter, grab the two projections and pull the filter towards filter you. Note • The pre-filter is washable. • Clean the pre-filter for every two weeks to ensure optimal functioning of the purifier.

Switch off the purifier and unplug it. To reattach the front panel, insert the top hooks into the top of the purifier first (1). Then, push the panel against the body of the purifier (2). Note • Alternatively, you can clean the pre-filter by removing the dust with a vacuum cleaner. Page 15: Replace The Filters, Replace The Activated Carbon Filter And The Hepa Filter 7 Replace the Switch off the purifier and unplug it. filters The filter replacement light ( ) indicates the filters have to be replaced. Note • If you remove the front panel for filter changing while the purifier is switched on, all lights on the control panel will be off. Remove all packaging material from the Place the pre-filer in the purifier. Note Place the new HEPA filter in the purifier first. • Make sure that the side with the two projections is pointing towards you, and that all hooks of the pre-filter are properly attached to the purifier. Page 17: Reset The Filter Lifetime Counter 8 Reset the filter Press and hold the button for 2 seconds.
lifetime counter When you replace the filters, it is important that you also reset the filter lifetime counter afterwards. This allows the purifier to be in sync with the filter lifetime. After you have replaced the filters, reset the filter time: Switch off the purifier and unplug it. 9 Troubleshooting This chapter summarizes the most common problems you could encounter with the purifier. If you are unable to solve the problem with the information below, contact the Consumer Care Center in your country. Problem Possible solution light has been on The filter is full. Page 19: Guarantee And Service, Order Parts Or AccessoriesIf you have problems obtaining the parts, please contact the Philips Consumer Care Center in your country (you find its phone number in the worldwide guarantee leaflet). Page 20: Compliance With Emf One of Philips’ leading Business Principles is to Environmental information take all necessary health and safety measures All unnecessary packaging has been omitted.