laser lens cleaner til ps3

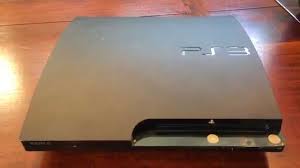
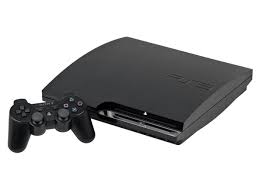
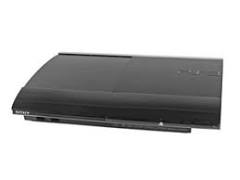
Safely Clean DVD Player Laser Lenses Safely Clean DVD Player Laser LensIt lets you safely clean your DVD player. How to clean a laser lens CleanDr for DVD Laser Lens Cleaner Image and Sound Calibration Tools Storage Case 6 59846 41902 8 Can CleanDr for DVD damage my player? Can I use CleanDr for DVD on a bluray player? How can CleanDr extend the lifetime of my player? Replace HDMI Port PS3 Slim PS3 slim wont read discs and wont spin Why wont my ps3 play discs? PS3 Slim not reading disk Hard Drives (SATA) (5) TR8 Torx Security Screwdriver Arctic Silver Thermal Paste To find a list of common hardware fixes, check out the PlayStation 3 Troubleshooting page. Hard Drive: The hard drive in the PS3 Slim can be upgraded to 750 GB. There are several models of the Sony PlayStation 3. This is the newer PS3 Slim, not to be confused with the PlayStation 3. The PS3 Slim is not backwards compatible with PS2 games, and lacks some other features that were included on the original version of the PS3.
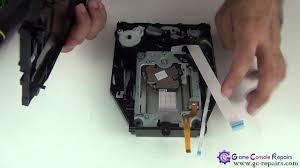
YouTube: iFixit's Video Slideshow of the PS3 Slim iFixit Blog: PlayStation 3 Slim Teardown Read 24 customer reviews May just need the laser replaced. Follow this video guide found here PlayStation 3 Super Slim Laser Lens Replacement
aom air cleaner 5 - 10 minutes
kuryakyn hypercharger air cleaner kit My name is Stephen.w and I'm here to help you.
asthma ionic air purifiersIt's not the disc or the laser it's the disc stopper what your gonna need to do is remove the back panel and by the door of your disc cover you'll see a little plastic wing slide the cover back and there's your problem lift up the little tab and insert a small pick or something what I did was I got a small plastic pick and cut it in a angle and made one side big and the other

small and dipped it in super glue and placed it in and that's it disc spins and now you can play. Now remember if wemon don't find you handsome they'll at least find you handy lol P.S for the PS3 super slim I have found a cure! On my system everything but the optical drive worked fine, no overheating and good picture. But the optical drive eventually would not read discs! At first I had to put it on its side (opposite side to screw-in vertical stand) and keep it there. That's ONE temporary fix..another that I soon discover when that eventually stopped working was MANUALLY SLIDING OPTICAL DRIVE TO LEFT POSITION BEOFRE STARUP. Found that it was very stiff and the motor wasn't able to move optics to "read" position and where simply stuck in open! turn it off, hold in the power button until it beeps once twice and then a 3rd time, take your finger off. then hold it in again you will here it beep once then a short time after a second beep and a short time after that two close beeps take your finger straight off, ur system will turn on it will give u a list starting with restart your system, go for rebuild data base hope this help, u can try them all if this doesnt work

Clean the laser with a cotton swab and then clean the disc with waterEdit ArticleHow to Clean a Game Disc Three Methods:Cleaning a Game Disc with WaterCleaning a Disc using Other MethodsCleaning Disc DrivesCommunity Q&A Game system consoles are often unable to recognize and read soiled game discs. Dust, lint, grime, and even fingerprints that find their way onto game discs can cause a system error. When cleaning discs, always use the most gentle methods first, as the same treatments that remove dirt and scratches can cause more damage if used too aggressively. If the game still won't run, patiently try more heavy-duty treatments in turn. Cleaning the disc drive itself is also a good idea, especially if you get error messages for more than one game. Clean only when necessary. Find a soft, clean cloth. Dampen a small area of the cloth. Use regular tap water to wet a small area of the cloth, then squeeze it out to remove excess water. Never use household cleaning products, which can ruin the disc.
Disc repair products may be sold as "scratch repair" or "CD/DVD repair" products. Hold the game disc by its rim. Do not place your fingers on the surface of the disc. Turn the game disc so the non-labeled, reflective side faces you. If the labeled side is clearly dirty, you can use this same method — but be extremely careful, as wiping the labeled side too vigorously can destroy the data on some game discs. Wipe the disc surface from the center outward with the wet cloth. Gently wipe the disc with the wet cloth, starting from the center hole and moving in a straight, short line to the rim. Repeat until the entire disc has been wiped. Never move the cloth in circles around the disc, as this can damage it. Repeat with the dry area. Wipe the same side of the disc a second time. This time, use the dry portion of the cloth to remove moisture. Take care to use the same straight strokes, from the center of the disc outward. Dry wiping is more likely to scratch the disc than wet, so be extra gentle during this step.

Wait two minutes before testing. Put the disc down with the reflective side face-up. Wait at least two minutes to allow the remaining moisture to evaporate. Once the disc is completely dry, put the disc into the disc drive of your game console or computer and check whether the problem is fixed. If there are still problems, try the other methods below. If your other games also won't run, clean your disc drive. Mail your disc to a repair service. Remove fingerprints and grease with rubbing alcohol. This method will not repair scratches, but should remove grease stains. Apply a dab of isopropyl alcohol to a clean cloth, and rub the disc from the center to the rim. Carefully wipe off moisture with a dry cloth with the same motions, then let sit for two minutes so it is completely dry. Since dry cloths can cause scratches, some disc owners prefer to let the disc air-dry for half an hour or more instead. Purchase a disc cleaner spray. If the game still won't boot up, purchase a "disc repair" product in spray bottle form and follow the instructions on the packaging to clean the disc.
This may be sold as a "CD/DVD repair" or "scratch repair" product. Using a disc repair buffing wheel or other machine that comes with the disc repair product is highly discouraged, as these can cause damage. Always check the warnings to make sure the product is safe for your type of disc. Use a non-whitening, non-tartar-control toothpaste. Toothpaste is slightly abrasive, and can polish off scratches with low risk of causing more damage.[4] For maximum safety, avoid whitening and tartar control toothpastes, which tend to be more abrasive.[5] Apply the toothpaste as you would water or rubbing alcohol, as described above. The toothpaste must be in paste form. Don't use a gel, liquid or powder. Select a safe polish. If toothpaste doesn't work, you can move on to plastic polish, furniture polish, or metal polish. These are also slightly abrasive, but because they are not intended for game discs, there is a higher risk of damage. Always check the ingredients list for "solvents," "petroleum," or petroleum based products before using, as these can dissolve through the CD and destroy it.

If it smells like kerosene or gasoline, don't use it. Some people report that Brasso metal polish is effective, but this does contain a mild solvent. Use at your own risk. Use a clear wax. Deep scratches can be filled in by gently applying a clear wax, then buffing it in with a clean, dry cloth moving in straight lines from the center outward. 100% carnauba wax or another non-petroleum-based, clear product is recommended.Use a handheld air bulb to gently blow out dust from the drive. A can of compressed air will also work, but could cause damage to delicate drives. Always hold the can upright during use, or the propellant material may leak out. Purchase a laser lens cleaner. If your game console or computer won't play a brand new, scratch-free disc, you may need to clean or repair its disc drive. A laser lens cleaner will only remove dust, not grease or caked-on dirt, but it's easy to use and worth a try.Typically, this comes in two parts: a disc to be inserted into the drive, and a bottle of liquid to drip onto the disc beforehand.
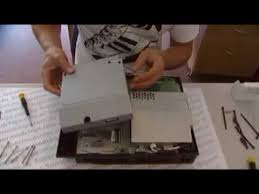
Make sure the cleaner is designed for your type of player, such as a DVD drive or PS3. Even using a CD drive cleaner on a DVD drive could damage it.If the steps above don't work, and you don't want to take the drive to a professional repair shop, you'll need to disassemble the drive and clean the lens. If your device is still under warranty, be aware that this will likely void any chance of getting a replacement or free repair from the manufacture. If you're prepared to take the risk, follow these steps: Shut off the device and unplug it. Disassemble the drive using a screwdriver. Some game console faceplates can be removed using pressure from your fingers, but do not apply force unless a guide to your specific model recommends this.[10] Continue disassembly until the entire, round drive and surrounding areas are visible. Look at the lens. This is a small, glass object. Minor scratches shouldn't cause problems, but deep scratches could require professional treatment.
[11] More commonly, dust or grime is causing issues, in which case you can clean it: Dampen a cotton or foam swab in 91%+ isopropyl alcohol. Gently wipe the lens. Allow to air dry before reassembling the drive. Blot any liquid spills immediately with a soft cloth. Do not rub or wipe the liquid away as this may damage the surface of the disc. Store your game discs in their original plastic covers to keep them clean and safe. Remove the disc before moving your game console or computer, to avoid damage. Do not wipe off the disc with your hands; it will just make it worse. Do not use mechanical disc cleaners, as these devices may cause permanent damage to the surface of the game disc. Soap, solvents or abrasive cleansers may cause permanent damage to your game discs. Some discs store the data just below the label. Do not clean the labeled side unless there is obvious dirt over it, and be extremely careful when doing so. Don't add tape or stickers to your disc.